Family life can be busy, especially with a couple of tweens and dogs. Staying on top of the appointments, athletics, birthdays, and to dos can be challenging. For the longest time, Alicia managed a physical whiteboard calendar and once a month, she'd pull it off the wall, wipe it down... and update it for the month ahead. This was a lot of work for her and it was inconvenient to maintain, so we decided to move this to a digital solution because...

Early on during the requirements phase, Alicia was adamant that she wanted to interact with a digital screen with touch controls to manage the content. This dramatically increases the complexity and cost of the solution... so I wouldn't recommend it. Also, with the solution I came up with, you're just managing the content from your phone or computer anyways. Easy peasy.
Let's start by me showing you the final product and discussing the different types of content you can display on this solution... then we'll get into what you'll need if you'd like to do something similar. I present... the Kirk Family Calendar!
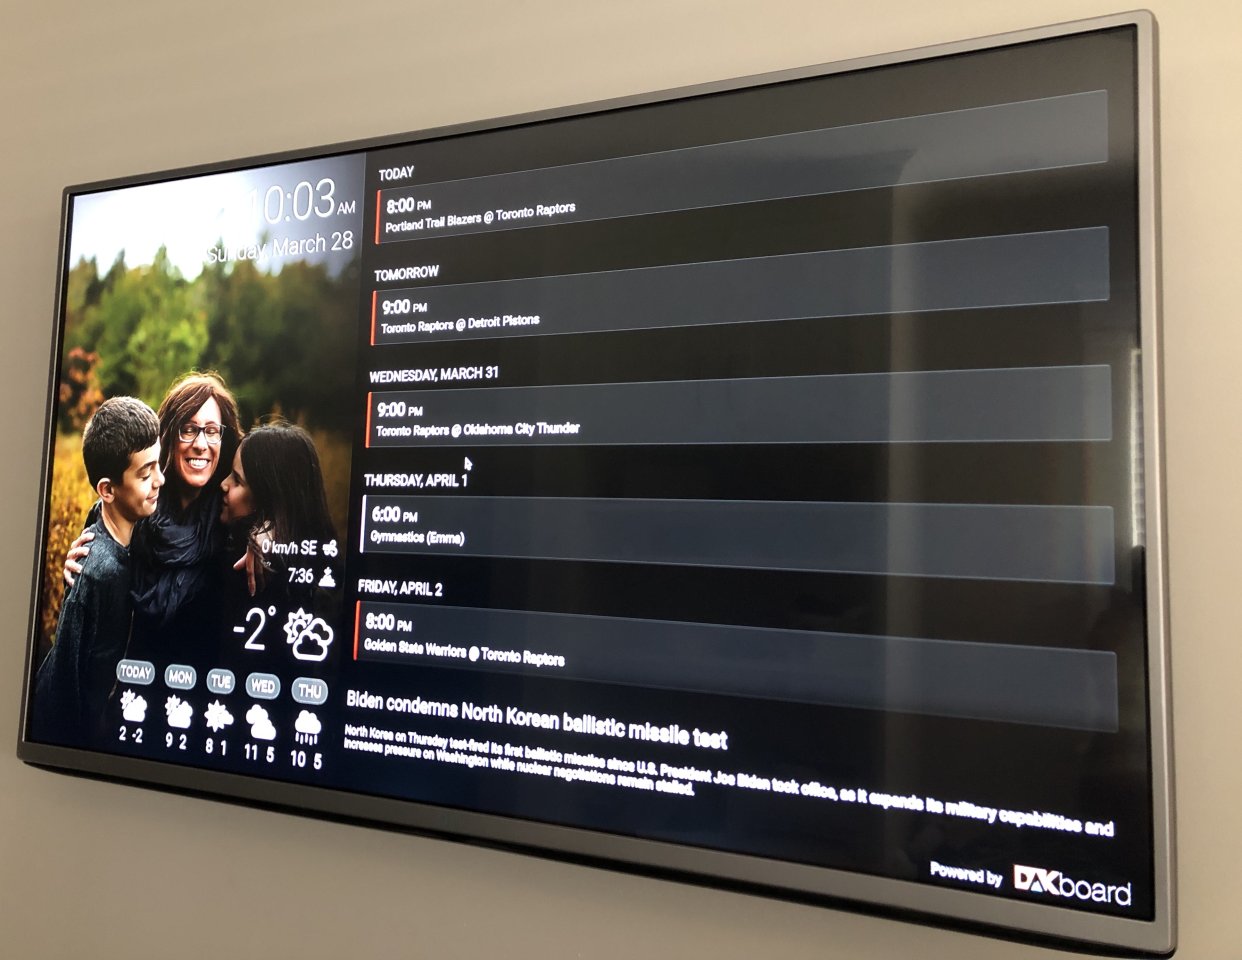

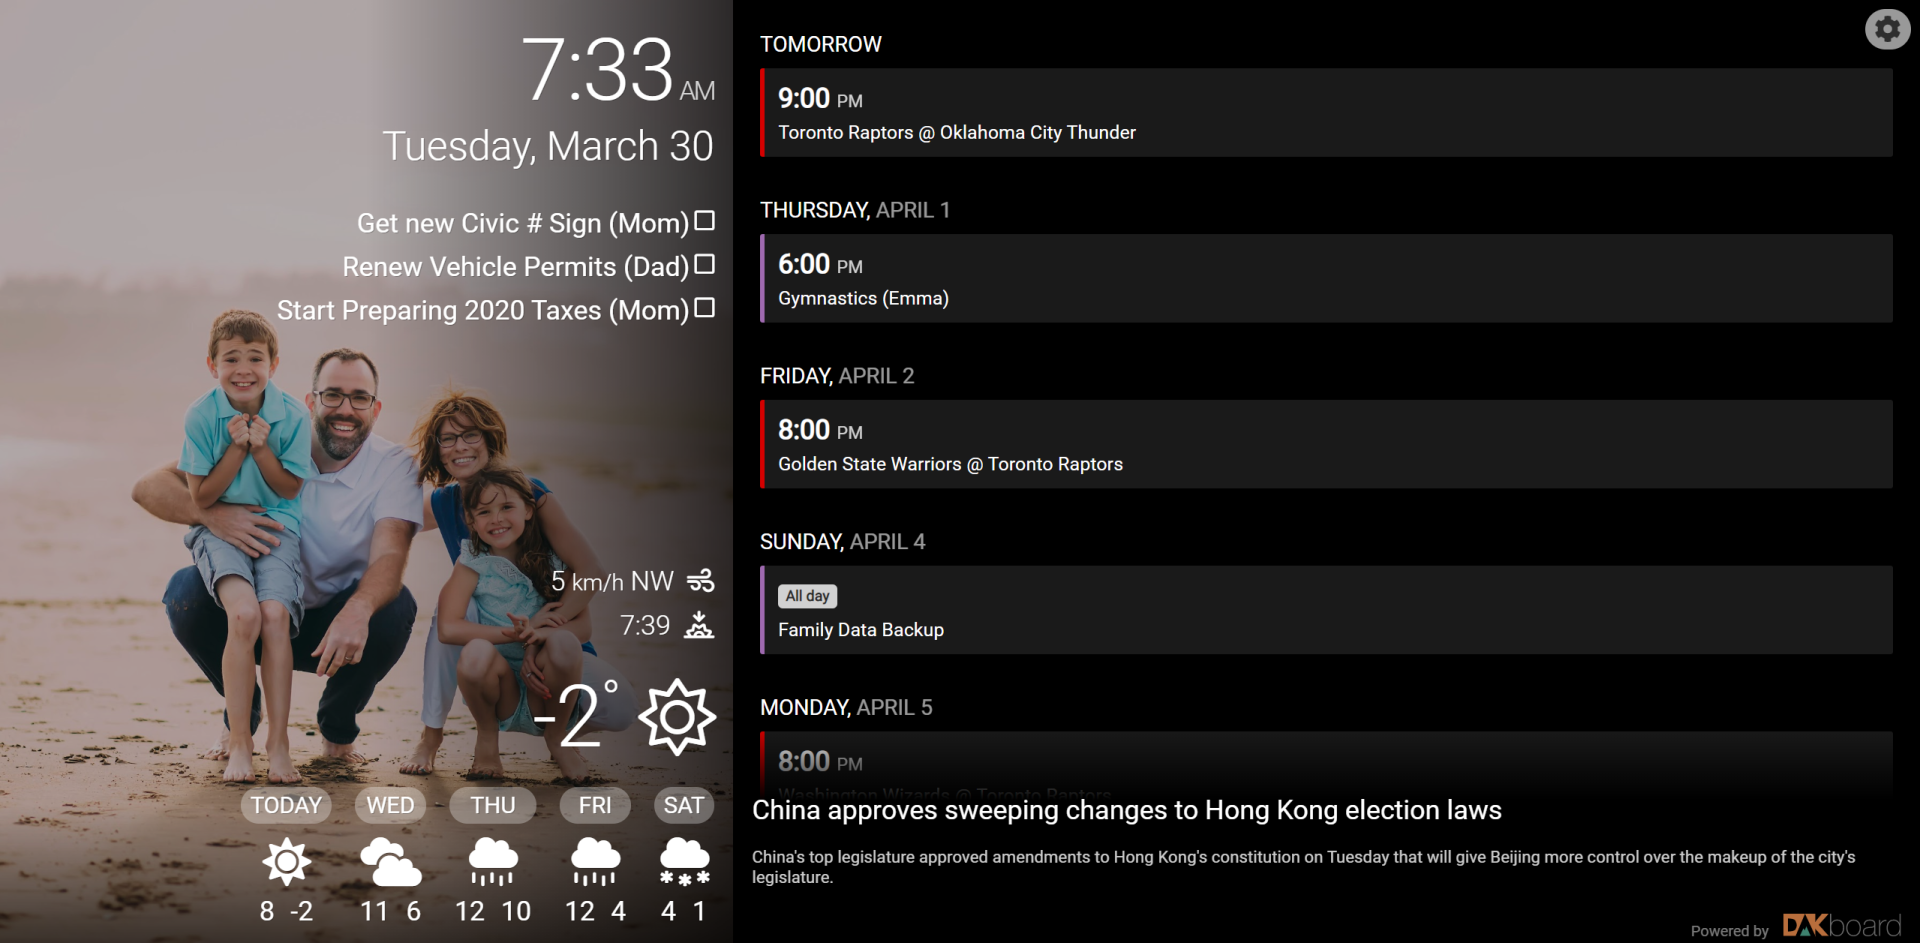
Here's a quick summary of the information we're displaying here:
- Family Calendar (sourced from a shared Google Calendar)
- Family To Do List (sourced from a shared Microsoft To Do list)
- Family Photo Album (sourced from Google Photos)
- Toronto Raptors Schedule (imported into a shared Google Calendar)
- Current Date and Time
- Weather Data with 5-day Forecast
- News (sourced from CBC News)
The star of the show in this solution is Dakboard. There are other options available, of course... many of which the nerd community would view as nerdier, but the free tier in Dakboard allows me to present all of the information above with relative ease. It's a simple content management system that you can configure in a matter of minutes. At the time of this writing, for $5/month, you can upgrade to Dakboard's Essential Plan which provides more layout customization and additional content type integrations... for me, the free tier is more than adequate.
What will you need to pull this off?
- A spare television or monitor: We opted to upgrade our family room TV and move the existing 42" TV to this role.
- A low profile wall mount. There are tons of cheap options on Amazon.
- A computer to drive the display: I opted for a used Raspberry Pi 3b.
- Raspberry Pi accessories: a case, a MicroSD card (8-16GB), a power adapter.
- A short HDMI cable, a 1 footer off Amazon is ideal.
- Some velcro tape to mount the Raspberry Pi on the back of the TV.
Dakboard does sell pre-configured Raspberry Pis for this purpose if a DIY project like this isn't your style. To their credit, they have also published instructions on how to DIY this project. Alternatively, there is a lot of YouTube content on this topic that helped inspire and instruct me.
We're really seeing the benefits of digitizing our family life in this way. The ability to display your most cherished family photos will also put a smile on your face every time you walk by.
Kirk out.